Let's Play with: Pi-Hole

Update 11 May 2020 : A few days after I wrote this post, Pi-Hole released version 5.0. Some of the new features impact the content here. Since it’s only been days, I have updated the content accordingly.
It was a long weekend, so it was time to play. Ubuntu 20.04 LTS just came out. This is important because of the “LTS” at the back of its name. I took the opportunity to upgrade “Ursula”, my home server. I have not been installing OSes like changing my clothes since High School, but I had big plans for this one.
Ad Blocking on a Network Level
Securing your internet is tough. I have “fond” memories of earlier days of the internet when browsing the internet exposed you to porn. How about flash movies that install software on your computer? It now seems quaint that people are surprised that they can be tricked over the internet with phishing and social engineering.
I value my privacy and I would like to control what goes on about me and my computers. I don’t like ads or tracking technologies. More people seem to be on my side on this one: with every browser claiming that they will block ads or trackers.
Browsers are important because they are the main window for ads or trackers. However, other activities also generate such risks, such as handphones, smart gadgets, and other internet-connected devices.
If you are accessing the internet outside of your browser, your browser won’t protect you. The more comprehensive solution is to protect on a network level.
To protect yourself on a network level, you will adjust your internet router settings and how your internet traffic is processed so that all requests are caught. A blacklist of trackers and suspicious websites is usually maintained. If a query meets the blacklist, they are not processed.
As you might expect, fidgeting with your internet router settings, finding out what your ISP’s upstream servers are, or even niggling around config files is very daunting for most users.
Enter the Pi-Hole
I first learned about Pi-Hole through the DigitalOcean Marketplace. It was great that it was designed for containers from the start, because I wanted “Ursula” to serve services using containers instead of the complexity of figuring out Ubuntu Linux’s oddities.
 Pi-hole logotelekrmor
Previously I implemented my internet blacklist using response policy zones in a bind9 server. I am not entirely sure how I did it… which would be a disaster if my server gets wiped out.
The best thing about dockers is that you would write the configuration in one file (like a docker-compose.yml for me) and it’s there. Once you have reviewed the configuration, you would just call docker-compose up and the program starts up for you.
Once you have the server running, you can ogle at its work with pi-hole’s gorgeous dashboard:
 So many queries, so many blocked. ( Update 11/5/20 : Screenshot updated to show the new version 5.0 interface. So many bars now!)
I could make a few conclusions from the work of my Pi-Hole server so far:
- Several queries were blocked from my handphone. This shows that phones are a hotbed for ad trackers. Since most of us use our phones for web browsing, advertising on the internet has not taken a hit even though more browsers feature some form of adblocking.
- The second chart (labelled “Clients “Over time)”) roughly corresponds to the computers used during the day. During this circuit breaker period, you can see your work computers dialling “home”. At night, more home computers are sending queries.
Installation Headaches
Using Pi-Hole as a local LAN DNS server
My previous LAN DNS server was meant to serve DNS queries for my home network. My home server and Network Attached Storage device were its main customers. I also exposed some of the services (like my Plex) to the outside world. If my LAN server was not around, I will have to remember many octets (read IP addresses).
Update 11/5/2020 : In the original post, I complained about setting local LAN hostnames being hidden. Version 5.0 now allows you to set hostnames through the admin dashboard. This is one feature that I would be using! Turns out, it was quick and easy!
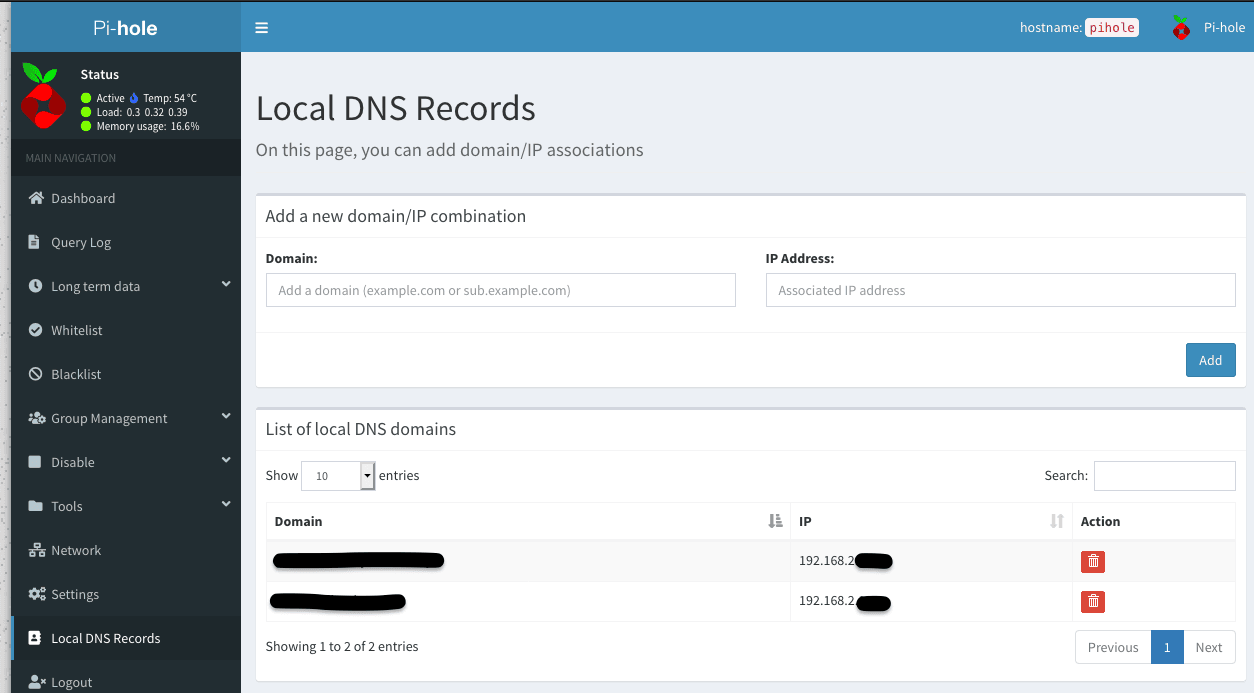 The dashboard used to add local DNS domains. New in version 5.0.
Installing Pi-Hole Behind a Traefik Server/Reverse Proxy
I didn’t wreck my Ubuntu 18.04 LTS server so that I could install Pi-Hole. I wanted to be able to serve several services through my Home Server without having to be limited by one set of 80 (HTTP) and 443 (HTTPS) ports. Pi-Hole uses both of those ports. I will not be able to have any more web servers.
A reverse proxy routes a request to the correct server. My forays with Nginx and the traffic server had not been successful. Traefik got me curious because it claimed it could automatically figure out configurations automatically. If I could get Traefik to work, Traefik could sort out how to have several applications on one host!
 Traefik Labs: Makes Networking Boring
So getting Traefik to work was a priority, but I also really wanted to set up Pi-Hole first. Curiously, there are some resources on getting both to work together correctly. Since this was the first time I was using both Traefik and Pi-Hole, I needed to experiment badly. In the end, I went down with this configuration in my docker-compose file:
version: '3'
services: reverse-proxy: # The official v2 Traefik docker image image: traefik:v2.2 containername: traefik # Enables the web UI and tells Traefik to listen to docker command: —api.insecure=true —providers.docker ports: # The HTTP/HTTPS port – “80:80” – “443:443” # The Web UI (enabled by —api.insecure=true) – “8080:8080” volumes: # So that Traefik can listen to the Docker events – /var/run/docker.sock:/var/run/docker.sock – /home/houfu/traefik/:/etc/traefik/ environment: DOAUTH_TOKEN: [... Token provided by Digital Ocean for SSL certificate generation] restart: unless-stopped
### pi-hole
pihole:
containername: pihole
domainname: xxx.home
hostname: pihole
image: pihole/pihole:latest
dns:
– 127.0.0.1
– 1.1.1.1
ports:
– '0.0.0.0:53:53/tcp'
– '0.0.0.0:53:53/udp'
#– '0.0.0.0:67:67/udp'
– '0.0.0.0:8052:80/tcp'
– “0.0.0.0:8443:443/tcp”
volumes:
– ./etc-pihole/:/etc/pihole/
– ./etc-dnsmasqd/:/etc/dnsmasq.d/
# run touch ./pihole.log first unless you like errors
# – ./pihole.log:/var/log/pihole.log
environment:
ServerIP: 192.168.2.xxx
PROXYLOCATION: pihole
VIRTUALHOST: pihole.xxx
VIRTUALPORT: 80
TZ: 'Asia/Singapore'
WEBPASSWORD: PASSWORD
DNS1: [VQ Server 1]
DNS2: [VQ Server 2]
restart: unless-stopped
labels:
# required when using —docker.exposedbydefault=false
– “traefik.enable=true”
# https://www.techjunktrunk.com/docker/2017/11/03/traefik-default-server-catch-all/
– “traefik.frontend.rule=HostRegexp:pihole.xxx,{catchall:.*}”
– “traefik.frontend.priority=1”
– “traefik.backend=pihole”
– “traefik.port=80”
– “traefik.port=443”
(Some private information, like the names of my private servers and the IP of my ISP’s DNS servers, have been anonymised.)
Conclusion
I could not have done this without the copious time at home created by the circuit breaker. For now, though, I hope I can run this and many experiments on this server and report it on this blog. Is there something I should try next? Let me know in the comments!
#blog #tech #docker #DigitalOcean #Updated #OpenSource

- Discuss... this Post
- If you found this post useful, or like my work, a tip is always appreciated:

- Follow this blog on the Fediverse [Enter the blog's address in Mastodon's search accounts function]
- Contact me: