[Part 2] Do more with docassemble: Start a project and write a few questions
Introduction
In Part 1, we talked about what we will do and the things you need to follow in this tutorial. Let’s get our hands wet now!
We are going to get the groundwork done by creating four pages. The first page gets the text to be turned into speech. The second page chooses the voice which Google will use to generate the audio. The third page edits some attributes in the production of the audio. The last page is the results page to download the spoken text.
If you are familiar with docassemble, nothing here is exciting, so you can skip this part. If you’re very new to docassemble, this is a gentle way to introduce you to getting started.
1. All projects begin like this
Log in to your docassemble program and go to the Playground. We will be doing most of the work here.
If you’re working from a clean install, your screen probably looks like this.

- Let’s change the name of the interview file from
test.ymltomain.yml. - Delete all the default blocks/text in the interview file. We are going to replace it with the blocks for this project.
You will have a clean main.yml file at the end.
2. I never Meta an Interview like you
I like to start my interview file with a meta block that tells someone about this interview and who made it.
It’s not easy to remember what a meta block looks like every time. You can use the example blocks in the playground to insert template blocks and modify them.
The example blocks also link to the relevant part of the documentation for easy reference. (It’s the blue “View Documentation” button.)
You should also use the example blocks as much as possible when you’re new to docassemble and writing YAML files. If you keep using those example blocks, you will not forget to separate your blocks with --- and you will minimise errors about indents and lists. After some practice (and lots of mistakes), you should be familiar with the syntax of a YAML file.
So, even though the example blocks section is found below the fold, you should not leave home without it.
You can write anything you like in the meta block as it’s a reference for other users. The field title, for example, is shown as the name of the interview on the “Available Interviews” page.
For this project, this is the meta block I used.
    metadata:
      title: |
        Google TTS Interview
      short title: |
        Have Google read your text
      description: |
        This interview produces a sound file based
        on the text input by the user and other options.
      revision_date: 2022-05-01
3. Let’s write some questions
This is probably the most visual part of the tutorial, so enjoy it!
An easy way to think about question blocks is that they represent a page in your interview. As long as docassemble can find question blocks that answer all the variables it needs to finish the interview, you can organise and write your question block as you prefer.
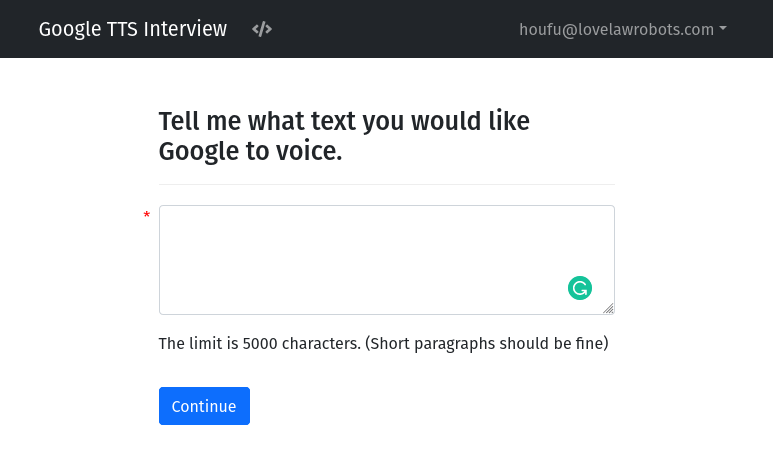
So, for example, you can add this text box block which asks you to provide the input text. You can find the example text box block under the Fields category. (Putting no label allows the block to appear as if only one variable is set in this question)
    question: |
      Tell me what text you would like Google to voice.
    fields:
      - no label: text_to_synthesize
        input type: area
      - note: |
          The limit is 5000 characters. (Short paragraphs should be fine)
You can also combine several questions on one page like this question for setting the audio options. Using the range slider example block under the Fields category, you can build this block.
    question: |
      Modify the way Google speaks your text.
    subquestion: |
      You can skip this if you don't need any modifications.
    fields:
      - Speaking pitch: pitch
        datatype: range
        min: -20.0
        max: 20.0
        default: 0
      - note: |
          20 means increase 20 semitones from the original pitch.
          -20 means decrease 20 semitones from the original pitch.
      - Speaking rate/speed: speaking_rate
        datatype: range
        min: 0.25
        max: 4.0
        default: 1.0
        step: 0.1
      - note: |
          1.0 is the normal native speed supported by the specific voice.
          2.0 is twice as fast, and 0.5 is half as fast.
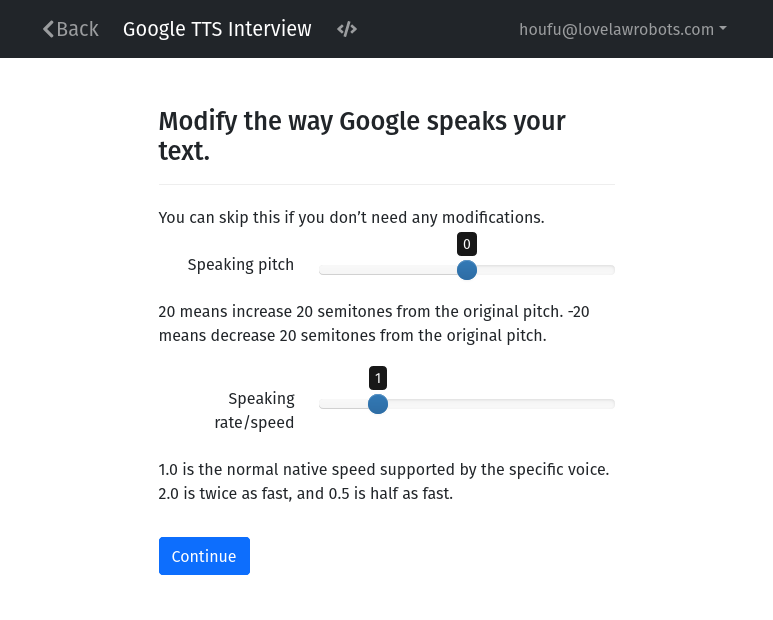
Notice that I have set constraints and defaults in this block based on the documentation of the various options. This will help the user avoid pesky and demoralising error messages from the external API by entering unacceptable values.
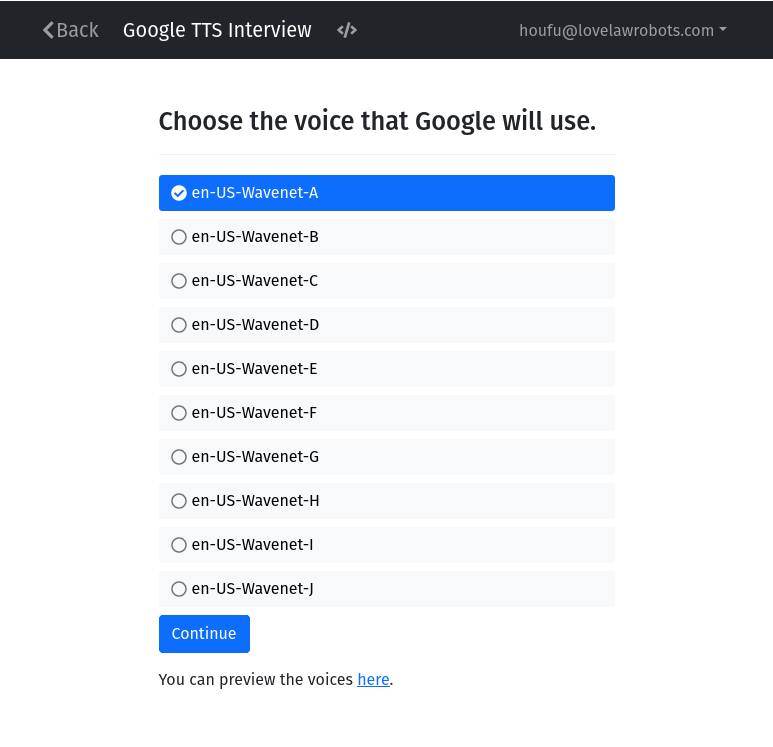
A common question for a newcomer is how should present a question to a user? You can use a list of choices like the one below. (Build this question using the Radio buttons example block under the Multiple Choice category.)
    question: |
      Choose the voice that Google will use.
    field: voice
    default: en-US-Wavenet-A
    choices:
      - en-US-Wavenet-A
      - en-US-Wavenet-B
      - en-US-Wavenet-C
      - en-US-Wavenet-D
      - en-US-Wavenet-E
      - en-US-Wavenet-F
      - en-US-Wavenet-G
      - en-US-Wavenet-H
      - en-US-Wavenet-I
      - en-US-Wavenet-J
    under: |
      You can preview the voices [here](<https://cloud.google.com/text-to-speech/docs/voices>).
An interesting side question: When do I use a slider or a text entry box?
It depends on the kind of information you want. If you input numbers, the field's datatype should be a number. If you’re making a choice, a list of options works better.
Honestly, it takes some experience to figure out what works best. Think about all the online forms you have experienced and what you liked or did not like. To gain experience quickly, you can experiment by trying different fields in docassemble and asking yourself whether it gets the job done.
4. The Result Screen
Now that you have asked all your questions, it’s time to give your user the answer.
The result screen is shown when Google’s API has processed the user’s request and sent over the mp3 file containing the synthesised speech. In the result screen, you will be able to download the file. It’s also helpful to allow the user to preview the sound file so that the user can go back and modify any options.
    event: final_screen
    question: |
      Download your sound file here.
    subquestion: |
      The audio on your text has been generated.

      You can preview it here too.

      <audio controls>
       <source type="audio/mpeg">
       Your browser does not support playing audio.
      </audio>

      Press `Back` above if you want to modify the settings and generate a new file,
      or click `Restart` below to begin a new request.
    buttons:
      - Exit: exit
      - Restart: restart
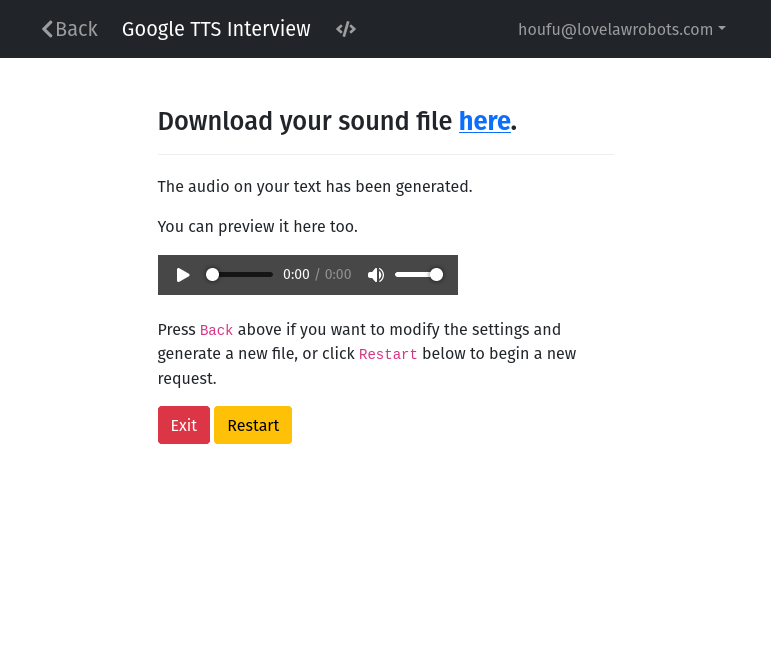
Note: This image shows the completed file with links on how to download it. The reference question block above does not contain any links.
You would notice that I used an audio HTML tag in the subquestion to provide my media previewer. Take note that you can use HTML tags in your markdown text if docassemble does not have an option that meets your needs. However, your HTML hack might vary since this is based on the browser, so try to test as much as possible and avoid complex HTML.
Preview: Let’s do some actual coding
If you followed this tutorial carefully, your main.yml will have a meta block, 3 question blocks and one results screen.
There are a few problems now:
- You cannot run the interview. The main reason is that there’s no “mandatory” block, so docassemble does not know what it needs to execute to finish the job.
- The results screen does not contain a link to download or a media to preview.
- We haven’t even asked Google to provide us with a sound file.
In the next part, we will go through the overall logic of the interview and do some actual coding. Once you are ready, head on over there!
👈🏻 Go back to the previous part.
☝🏻 Check out the overview of this tutorial.
#tutorial #docassemble #TTS #Google #Python #Programming

- Discuss... this Post
- If you found this post useful, or like my work, a tip is always appreciated:

- Follow this blog on the Fediverse [Enter the blog's address in Mastodon's search accounts function]
- Contact me: